
I’ve been told that paper crafting is easy for you. I bet that you never make mistakes. That’s not true. I make mistakes and I am not afraid to show you how I turned it around. You don’t have to throw out you project. You can save it and you may learn from it in the process.
Photo #1
Photo #2
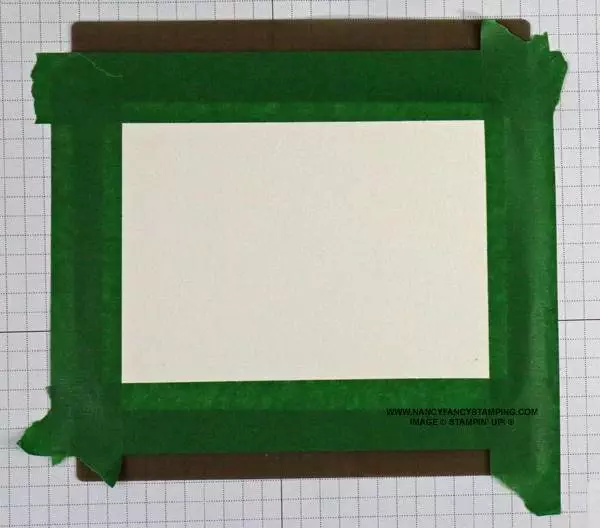
Photo #3
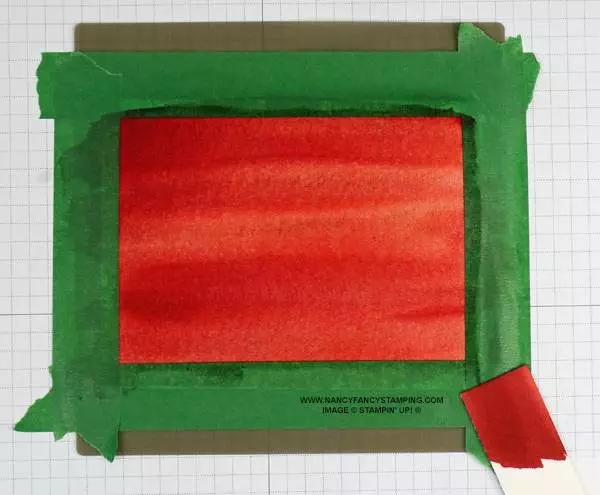
Photo #4

Photo #5
As you can see from Photo #3 And Photo 4, I was planning on creating a border around the Fluid 100 Watercolor Paper. I attached the Painter’s Tape, but I didn’t press it down enough and it leaked. I waited until it was FULLY dry and I removed the Painter’s Tape. I just cut off the White edge along the existing painted background. I still wanted a border, so I layered it on a piece of Basic Black Cardstock.
SUPPLIES
Stamp:
N/A
Inks:
Real Red Ink Refill (103287)
Paper (including Cutting Dimensions):
Real Red Cardstock {CS} (102482) 5-1/2” x 8-1/2”
Basic Black Cardstock {CS} (121045) 4” x 5-1/4”
Fluid 100 Watercolor Paper (149612) 4” x 5-1/4”
Gold Foil Sheets (132622) 2” x 2-3/4”
Accessories:
Bone Folder (102300)
Silicone Craft Sheet (127853)
Adhesive Sheet (152334)
Alphabet À La Mode Dies (160750)
Stampin’ Cut & Emboss Machine (149653) OR Mini Stampin’ Cut & Emboss Machine (150673)
Black & Very Vanilla 3/8” Ribbon (161982) 8”
Paper Snips Scissors (103579)
Pearalized Enamel Effects Basics – Red, White & Black (156310)
Stampin’ Seal+ (149699)
Stampin’ Dimensionals (104430)
Becel Margarine Lid
Wide Paint brush
Painter’s Tape
Basic White Medium Envelopes (159236)
INSTRUCTIONS
- Fold the Real Red CS in half and crease it using the Bone Folder. This is the card base. The fold should be along the top.
- Cut the piece of Basic Black CS to measure 4” x 5-1/4”. Adhere it to the Real Red Card Base using Stampin’ Seal+. Omit this piece if you are able to create a border around the Fluid 100 Watercolor Paper using Painter’s Tape. Either way, I would adhere the 4” x 5-1/4” Fluid 100 Watercolor Paper to the Silicone Craft Sheet. See Photo #2. This will prevent water from soaking through to your work surface if you use too much water and to keep it in place as you create the wash look.
- Cut the Fluid 100 Watercolor Paper to measure 4” x 5-1/4”. Set one of the pieces off to the side to be used as a test strip.
- Brush clean water over the entire surface using the wide Paint Brush. I dropped 4 drops of Real Red Ink onto the Becel Margarine Lid, added water and mixed. I tested the color on the Fluid 100 Watercolor Paper test strip. When the Real Red ink mixes with the clean water on the Fluid 100 Watercolor Paper, the colour will be muted. If you would like the more intense shade, do not add the clean water first. Keep in mind that you may see lines because the clean water helps to blend your strokes together. Cover the entire area. LET DRY BEFORE YOU REMOVE THE PAINTER’S TAPE. See Photo #3
- Adhere the Adhesive Sheet (152334) to the BACK side of the Gold Foil BEFORE you cut the letters out.
Lay the “L”, “O”, “V” and “E” Dies on the Gold side of the Gold Foil. I laid the “L” on the left side and the “E” on the far right side. Then position the “O” & the “V”. Adjust if you need to. Rip off the sticky part of the Post-It-Notes and use them to hold the dies in place and run it through the Stampin’ Cut & Emboss Machine OR Mini Stampin’ Cut & Emboss Machine. NOTE: If you position them correctly, you can use the cut out version on a future project. Some of the centers will be totally cut out. Make sure you keep the centers and glue them back in place. In my case it is the center of the “O”. - Carefully remove the Painter’s Tape. At this point you are going to use the Fluid 100 Watercolor Paper with the border or if the ink bled through, you’re going to cut that edge off and use the Basic Black CS. See Photo #4
- Remove the backing off of the Gold Foil Letters. Lay the “L”, “O”, “V” and “E” letters on the Real Red Fluid 100 Watercolor Paper. I laid the “L” on the left side and the “E” on the far right side. Then position the “O” & the “V”. Adjust if you need to. Only press down on the top, so you can reposition the letters if needed. Once you’re happy, press down the entire letters.
- Cut a 8” piece of Black & Very Vanilla 3/8” Ribbon using the Paper Snips. Apply Stampin’ Seal+ to the back of the Black & Very Vanilla 3/8” Ribbon to the ends and in the middle. Adhere the middle first and the wrap the ribbon around the Fluid 100 Watercolor Paper and secure it on the back.
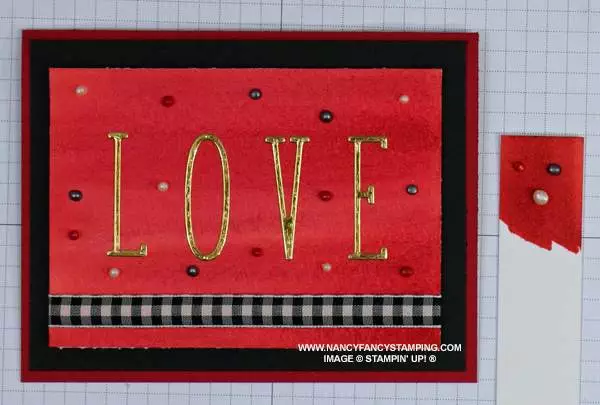
- I tested each colour of the Pearalized Enamel Effects Basics on my test strip of Fluid 100 Watercolor Paper. Then, I applied 5 of each colour – Red, White & Black to the Real Red Fluid 100 Watercolor Paper. DO NOT TOUCH. This has to completely dry. If you want to see if they are dry, go to the test strip and check it there. Who cares if you mess those ones, at least you’re not messing the ones for your card. See Photo #5
- Depending on what you decide, you’ll adhere the Basic Black CS first using Stampin’ Seal+ and the Real Red Fluid 100 Watercolor Paper using Stampin” Dimensionals.


 Large Check Ribbon")


Stampin’ Up added some Products to the 2025 Sale-A-Bration promo. Until February 28, 2025, you can earn the Alphabet À La Mode Dies, FREE with a qualifying order of $75.00 (before shipping and taxes). To make sure that you receive the Alphabet À La Mode Dies for FREE use Product #168074