
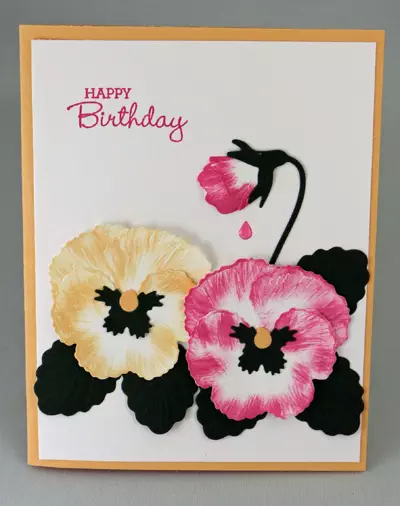
Pansy Patch Birthday Card
This Happy Birthday Card celebrates Victoria Day and my special friend, Sev’s Birthday. I wanted to show you a different way to add colour to these pretty pansies.
SUPPLIES
Stamps:
Pansy Patch (photopolymer 1549999) You can purchase this Stamp Set only OR as part of the Pansy Petals Suite (155810) OR Pansy Patch Bundle (155674)
Ink:
Pale Papaya Classic Stampin’ Ink Refill (155671)
Polished Pink Classic Stampin’ Pad (155712)
Polished Pink Classic Stampin’ Ink Refill (155713)
Polished Pink Stampin’ Blends Combo Pack (155520) – Dark Stampin’ Blend
Paper (including Cutting Dimensions):
Basic White Cardstock [CS] (159276) 4” x 5-1/4”, 2-1/2″ x 11″
Pale Papaya Cardstock [CS] (155668) 5-1/2” x 8-1/2”, scored and folded at 4-1/4” [Card Base], scrap
Evening Evergreen Cardstock [CS] (155574) 1-1/4″ x 11″
Accessories:
Bone Folder (102300)
Pansy Dies (155680) You can purchase this Die Set only OR as part of the Pansy Petals Suite (155810) OR Pansy Patch Bundle (155674)
Stampin’ Cut & Emboss Machine (149653) OR Mini Stampin’ Cut & Emboss Machine (150673)
Sponge Daubers (133773)
Clear Block C (118486)
Clear Block D (118485)
Silver & Clear Epoxy Essentials (155567)
Stampin’ Seal (152813)
Medium Envelopes – Basic White (159236)
The lid from a Becel Margarine Container
INSTRUCTIONS
1. Fold Pale Papaya Card Base. Crease using Bone Folder. The fold should be along the left side.
2. Stamp “Happy Birthday” in the upper left hand corner of the Basic White CS using Polished Pink Ink. Adhere to the Card Base using Stampin’ Seal.
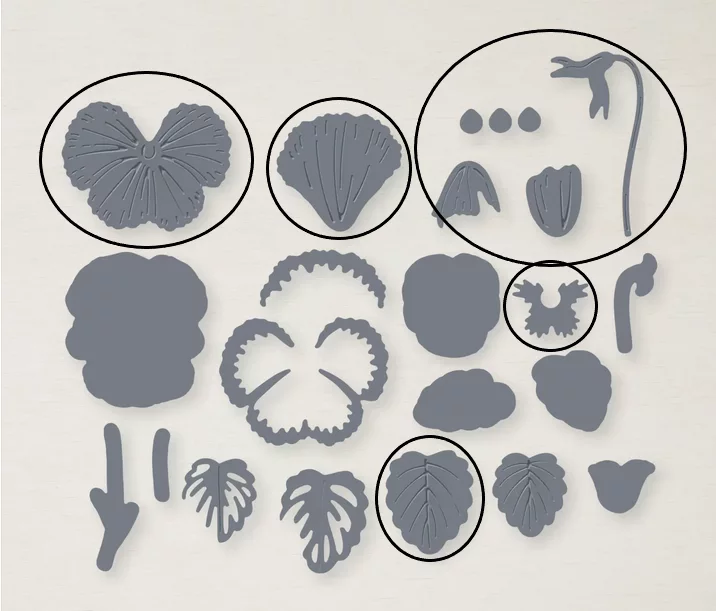
3. See Photo #3 for the dies that I used to cut out 2 solid Pansy Faces, 4 Pansy Leaves, 1 larger Pansy Bud & 1 smaller Pansy Bud using Basic White CS and the Stampin’ Cut & Emboss Machine (149653) OR Mini Stampin’ Cut & Emboss Machine (150673)
4. See Photo #3 for the dies that I used to cut out 5 larger solid leaves, 2 – 4 sided center and 1 Bud Stem using Evening Evergreen CS and the Stampin’ Cut & Emboss Machine (149653) OR Mini Stampin’ Cut & Emboss Machine (150673)
5. See Photo #3 for the die that I used to cut out 3 Pansy Centers using Pale Papaya CS and the Stampin’ Cut & Emboss Machine (149653) OR Mini Stampin’ Cut & Emboss Machine (150673). This is the die with 3 centers all together. You’ll only need to use 2 of them.
6. Put a couple of drops from the Pale Papaya Classic Stampin’ Ink Refill onto the Margarine Lid. Dip the Sponge Daber into this ink. Test it before you add it to the Pansy part. Colour as shown. I only used a little bit of pressure. You can always go back and add more colour if it isn’t enough. Repeat this process with a second new Sponge Daber and Polished Pink Classic Stampin’ Ink Refill. TIP: When you are done, blot as much ink out of the Sponge Dauber as you can. Set aside to dry. I put it in a plastic zip lock bag and write the name on it. You have them to use on a future project.
7. Assemble Card as follows:
– Take the Bone Folder and use it to give the leaves dimension. Flip them over and add Stampin’ Seal and adhere as shown.
– Take the Bone Folder and use it to give the 2 Bud parts dimension. Adhere them together and then adhere them to the Evening Evergreen Stem using Stampin’ Seal. Adhere the entire flower to the Card Base using Stampin’ Seal at the top and a little at the bottom of the stem. It will show if you use it all the way along.
– Flip the 4 sided Evening Evergreen Pansy center over and 1 Pale Papaya center will fit in the groove. Adhere them together using Stampin’ Seal.
– Take the Bone Folder and use it to give the Pale Papaya Pansy leaves dimension. Flip them over and add Stampin’ Seal to build the Pansy. Once the 3 parts are together, add the the other centers and add more Stampin’ Seal to the back and adhere as shown. Repeat this process using the Polished Pink Pansy parts.
8. While the Clear Epoxy Essentials Droplet is still on the sheet, colour it using the Dark Polished Pink Stampin’ Blends. Let it dry. Take it off and adhere it under the Pansy Bud.
9. Decorate Envelope if you choose.
Check out the Pansy Patch Stamp Set